Getting a jump on the New Year 2016. Signed up for the Crazy Quilt Journal Project (CQJP) 2016, and have the idea for my blocks worked out. Now to make them - they will come later. LOL
I do have my blocks made for the Under the Sea (UTS) Round Robin (RR) where we Do Your Own Blocks (DYOB) which starts January 15, 2016. This is a Crazy Quilt International (CQI) RR.
So, using some Dupioni Silk, Satins and Batik fabrics, I have my blocks ready for the ladies to work on.
Tuesday, December 29, 2015
Tuesday, December 1, 2015
Back to Blogging!
I thought I was going to take a short brake after the 2015 CQI Retreat, but it turned into a year break. So, sad! Back now, so here is what I just finished:
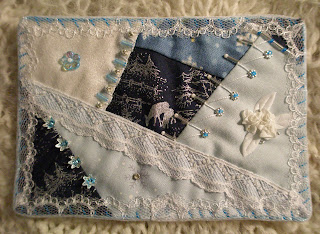
Winter Postcards for the Crazy Quilt International (CQI) Christmas/Winter Postcard Exchange.
Postcard #1 Message:
Postcard #2 Message
Winter Postcards for the Crazy Quilt International (CQI) Christmas/Winter Postcard Exchange.
I asked to exchange two (2) Winter postcards, as these are my Winter and Christmas colors. And I so want to display the lovely cards I receive in return for my cards.
I first crazy quilted the fabric pieces on the 6inch muslin and batting pieces. Then I added the hand embroidery and beads.
Once the CQ block was embellished, I cut it to the 6 inch x 4 inch Postcard size. I used Temtex as the Postcard support.
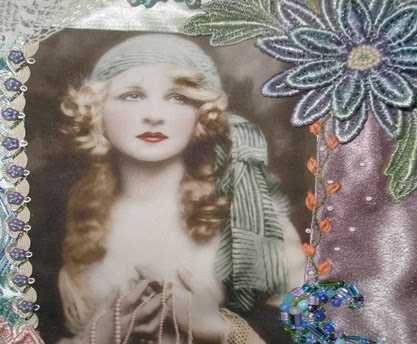
On the Message side, I scanned some postcards into my computer and used Photoshop to clean up any imperfections on the Vintage Postcards I had in my stash.
Once cleaned, I added the Message and addressed each postcard to it's recipient. I have Removed the recipients' addresses and names from these photos, for privacy.
Postcard #1: Front
Postcard #2 Front:
Postcard #2 Message
The Postcards with messages were printed on fabric and cut to size. I placed a small light Blue Rat-tail trim around the edge and whip stitched it down to the front & back of the Postcard. And finished up with a double edged 1inch lace over the edges. I used pins to hold sides together while stitching, no glue or adhesives were used.
Thursday, January 8, 2015
Steampunk DYOB - Colleen
Today I finished Colleen's block for the Steampunk DYOB (do your own block) RR (Round Robin).
I enjoy Steampunk, but admit I lean a little more to the Victorian than to the Industrial side of Steampunk.
When I received Colleen's blocks, I struggled with which of the 5 blocks I was going to work. It took a while, but I decided on one with larger spaces for the items I was going to use.
Here is what I did to the block:
I first used a Gloriana Princess Petite Perle in Red, on the black velvet fabric to the left. I did an X stitch (it is not the Herringbone) and then added the Bronze/Red beads to the center of the X's. On the outside of the X's, I used size 11 bronze seed beads.
Next was the Cretan Stitch in the same Gloriana thread, but this time I used a corrugated 3mm copper bead and added it to the top of each upward and downward stitch. The 5mm bead caps are stitched to the block using a Nymo thread and a 3mm copper bead.
The black lace used on the bottom of the block is in my Etsy Shop and added the look I wanted,
the Victorian in contrast to the Industrial. I individually stitched all bead on the project, so that if needed, Colleen could remove the single bead or set when stitching blocks together.
I used 6mm Bronze filigree bead caps and size 11 black seed beads on the center line of the Lace. I love beading, so anyone in a RR with me is for warned, I will use beads. LOL!
Black Loop Lace, also in my Etsy Shop, is used in the center and I used 3mm Copper Diamond shaped beads and copper tube beads over the top of the lace. These were stitch as a group as there would be no need to remove them for construction.
I used a lovely variegated yellow and red from Loraine's Etsy Shop on the red fabric at the top of the block, to carry the gold to the center and right side of block. Chain stitch was used to make to drapes across the seam and added a tiny Metal mesh bow and bronze key ring.
The telephone poles were made using the Gloriana thread in charcoal and I added the bronze airplane for that industrial and flight feel.
A bronze key with flowers and a watch face in the center was then added. I did use a Bronze bead cap with a size 6 bead in the center to hold the top in place. To secure the bottom of the key and to keep it from moving, I used 3mm bronze seed beads around the key just under the clock face, it added a nice touch while adding security to the key.
The Mariner's Compass was attached to block using 3 strands of size 11 seed beads in bronze.
Lastly, came the Spider in the center. This took some doing. I knew I wanted to add a spider, but I also knew I wanted it to be of metal, like an automaton.
So, I found the 18mm center copper bead, a golden 6mm bead the diamond shaped copper 3mm beads and the copper tube beads and attached them to the front and back of the spider with copper Head pins.
The four center legs were made with antiqued copper twisted square 13x 1.2mm tubes and the diamond shaped copper 3mm beads held together with the copper Head pins and attached to the construction portion of the first two sets of legs. Then stitched down with a monofilament thread to the block.
And that's it! I like it, and I hope Colleen likes it as well.
Subscribe to:
Posts (Atom)


